This one is for you. One of my customers was after a simple little Bon Voyage card. Well, I don't have any stamps that say that, so this is what I'd do... cheat! lol No really, use your computer, find a font you like, size - remember to make it big enough to read, not just what looks good and of course colour and then print. Now this customer doesn't have the Itty Bitty Banner stamps nor does she have the matching Framelits, but I'm sure you could easily use your scissors, only need to cut an indented triangle on one end because you don't see the other end... you'll understand when you look at the finished card.
Step 1: Get your supplies together (makes card making quicker!)
- Whisper white cardstock
- Pretty in Pink cardstock
- Melon Mambo cardstock
- Ribbon
- Embossing folder (I've used the polka dots)
- Snail
- Stick strip
- 1 large brad (you won't see it, so colour doesn't matter!)
- Scallop Circle punch
- Big Shot

Step 2: Stamp image
Step 3: Cut image.
I have used the Bitty Banners Framelits. After you've stamped your image, simply place the framelit over the image (as per diagram) and run it through the Big Shot. And there you have your perfect sentiment.Step 4: Cut, punch, emboss and fold
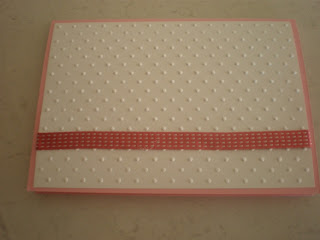
Fold the A5 Pretty in Pink cardstock in half.The Whisper White cardstock measures about 10cm x 14.2 and is embossed with the dots embossing folder through the Big Shot. (Don't have a Big Shot, well you can buy these pages already done from me, just another way to help you save some money.)
Punch 6 scallop circles from the Melon Mambo cardstock
Step 5: Stick it together
NOT ALL OF IT! First stick the ribbon to the Whisper White dotty paper. I place some snail adhesive on each end and a little in the middle. Then stick the White dots to the Pretty in Pink card.Step 6: Making the flower.
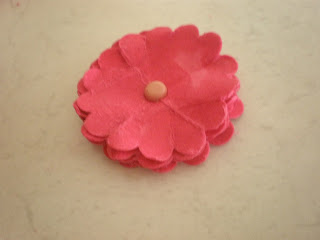
This is the Taa Daa of the card. And yep, you're making it yourself! |
| STEP A:
The 6 scallop circles need to be scrunched
|
 |
| STEP C: Punch the center of each circle. DO ALL 6! Don't have a punch? Try a skewer, a needle , a nail. It's only a little hole to put the brad into. |
 |
| STEP D: Thread all 6 damp scallop circles onto the brad and close the brad. |
 |
| STEP E: Scrunch (again) over the brad. |
 |
| STEP F: Still scrunch... each one individually... you'll get a better look. Make sure they are nice and tight. |
 |
| STEP G: Now carefully play with it til it looks like a flower that you're proud of and let it dry. It won't stick until it's dry! |
 |
| STEP H: Place some sticky strip on the back of the flower. Sticky strip is stronger tape and well worth the money. |
Step 7: Finish it off
Now you can stick the flower and your sentiment on. I think I would have preferred the Thank You pointing down, a bit more like a leaf.
Well there's my first tutorial for you. I hope it works for you and if you make a card using the flower, I'd love for you to send me a picture of it so I can post it here for all to see. Would also love to see the colours you choose to use. Please email your pics. Ta.
If you have any problems, I'm more than happy to help you. Just let me know.
I'll be back with a list of retiring colours and new colours very soon.
Keep leaving your mark,
Brooke


Thank you for sharing :)
ReplyDeleteWow Brooke, I'm impressed with your tutorial!
ReplyDeleteLorraine M